A practical way to provision instances on Amazon Web Service EC2 with Ansible.
Welcome, this article shows a simple approach to use Ansible for provisioning an AWS EC2 instance.
Ansible is a configuration management tool widely used to provision IT environments, deploy software or be integrated to CI/CD pipelines. There are lots of Ansible modules developed to ease tasks related to AWS cloud management.
The following steps will be performed along the article to demonstrate the power around the integration of Ansible and AWS Cloud:
- Create AWS user
- Install Ansible and Ansible EC2 module dependencies
- Create SSH keys
- Create Ansible structure
- Run Ansible to provision the EC2 instance
- Connect to the EC2 instance via SSH
Create AWS user
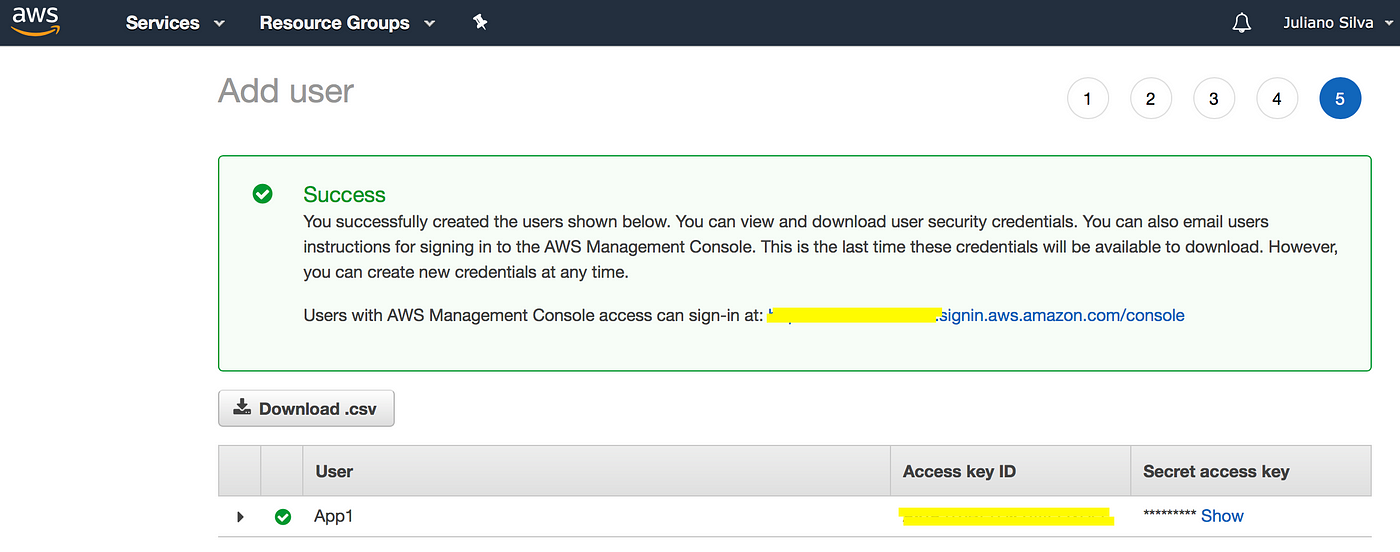
Open the AWS Console, search for IAM (Identity and Access Management) and follow this steps to create a user and take note of the Access Key and Secret Key that will be used by Ansible to set up the instances.

Install Ansible and the EC2 module dependencies
|
1 |
sudo apt install python<br>sudo apt install python-pip<br>pip install boto boto3 ansible |
This article was written with Ansible version 2.8.0 and Python version 2.7.
Create SSH keys to connect to the EC2 instance after provisioning
|
1 |
ssh-keygen -t rsa -b 4096 -f ~/.ssh/my_aws |
Create the Ansible directory structure
|
1 |
mkdir -p AWS_Ansible/group_vars/all/<br>cd AWS_Ansible<br>touch playbook.yml |
Optionally, you can use Git (or SVN) to keep the version control of this directory.
Create Ansible Vault file to store the AWS Access and Secret keys.
|
1 |
<strong>ansible-vault create</strong> group_vars/all/<strong>pass.yml</strong><br>New Vault password:<br>Confirm New Vault password: |
The password provided here will be asked every time the playbook is executed or when editing the pass.yml file.
This article will follow the approach above, however, if you don’t want to provide the password every time, an insecure approach can create the pass.yml file by specifying a hashed password file:
|
1 |
openssl rand -base64 2048 > vault.pass<strong>ansible-vault create</strong> group_vars/all/pass.yml <strong>--vault-password-file</strong> vault.pass |
With hashed password file you must specify the vault-password-file argument when running Ansible playbook and won’t be asked for the password:
|
1 |
<strong>ansible-playbook</strong> playbook.yml <strong>--vault-password-file</strong> vault.pass |
Edit the pass.yml file and create the keys global constants
Create the variables ec2_access_key and ec2_secret_key and set the values gathered after user creation (IAM).
|
1 |
<strong>ansible-vault edit</strong> group_vars/all/<strong>pass.yml</strong> <br>Vault password:<br>ec2_access_key: AAAAAAAAAAAAAABBBBBBBBBBBB <br>ec2_secret_key: afjdfadgf$fgajk5ragesfjgjsfdbtirhf |
Directory structure
|
1 |
➜ AWS_Ansible tree<br>.<br>├── group_vars<br>│ └── all<br>│ └── pass.yml<br>└── playbook.yml2 directories, 2 files |
Open the playbook.yml file and past the following content
Notes about the playbook
- For security, the playbook will execute by default just the tasks to collect information on AWS. The tasks responsible for provisioning the instance will be performed if specified the tag create_ec2.
- The first step to create the user (IAM) can also be performed with the Ansible iam module, but here was demonstrated on the AWS Console to show the interaction.
Running Ansible to provision instances
If you execute Ansible without the tags argument the creation tasks won’t be performed.
|
1 |
ansible-playbook playbook.yml --ask-vault-pass |

Create the instance
|
1 |
ansible-playbook playbook.yml --ask-vault-pass <strong>--tags create_ec2</strong> |

Get the public DNS
|
1 |
ansible-playbook playbook.yml --ask-vault-pass |

Connect to the EC2 instance via SSH
|
1 |
<strong>ssh -i ~/.ssh/my_aws</strong> <a href="mailto:[email protected]">ubuntu@ec2-18-218-148-27.us-east-2.compute.amazonaws.com</a> |

Congratulations, you’ve automated the EC2 instance provisioning process with Ansible.
