Would you like to use Cloudflare Turnstile to help prevent spam submissions in your WordPress forms? Cloudflare Turnstile is a free, CAPTCHA-like alternative that offers a user-friendly experience by confirming visitors are real humans without showing them any puzzles.
Before you get started, ensure WPForms is installed and activated on your WordPress site.
1. Generating Cloudflare Turnstile API Keys
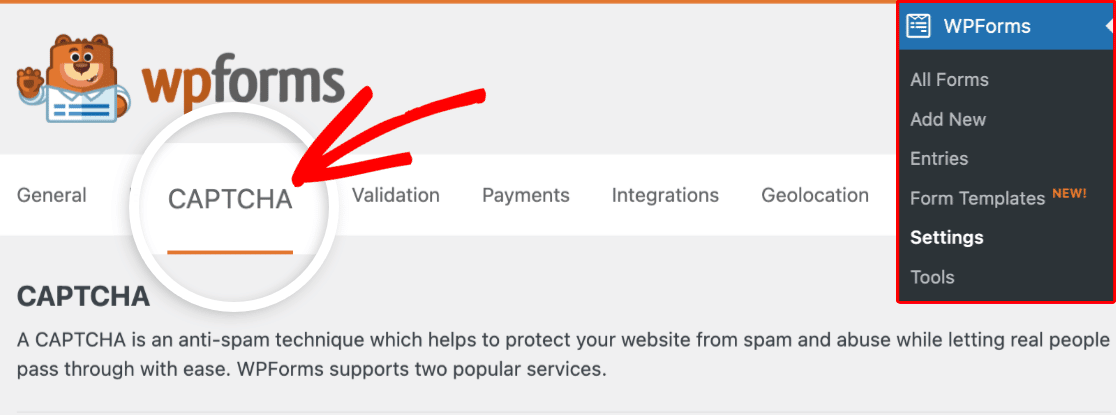
To start, log in to your WordPress admin area and go to WPForms » Settings. Then click on the CAPTCHA tab.
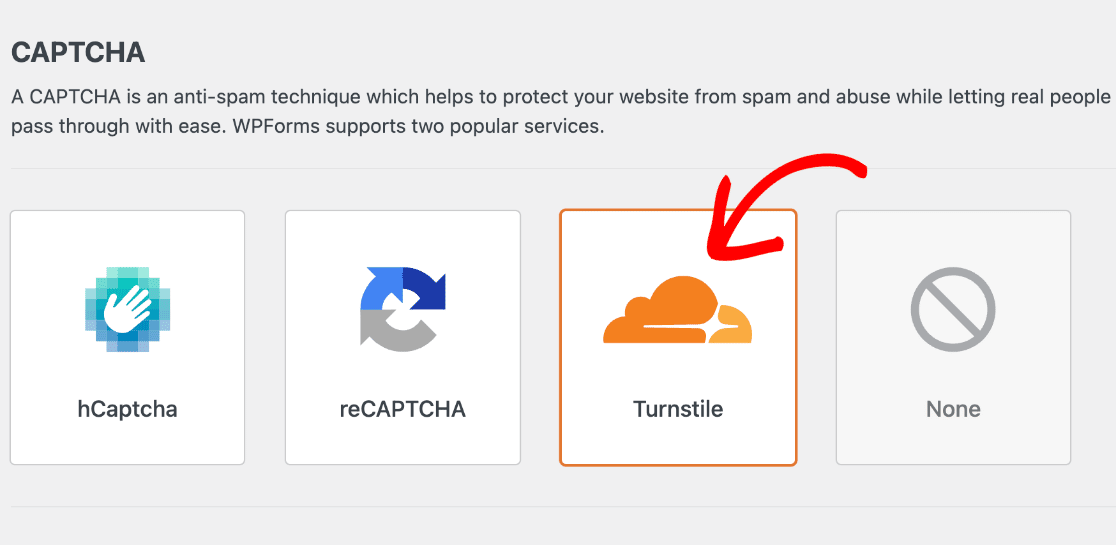
To configure Cloudflare Turnstile, select the Turnstile option.
Once selected, additional settings will appear. You’ll need to generate a set of API keys from your Cloudflare account to connect it with WPForms. Leave this browser tab open and proceed to the next step.
Adding Your Site in Cloudflare
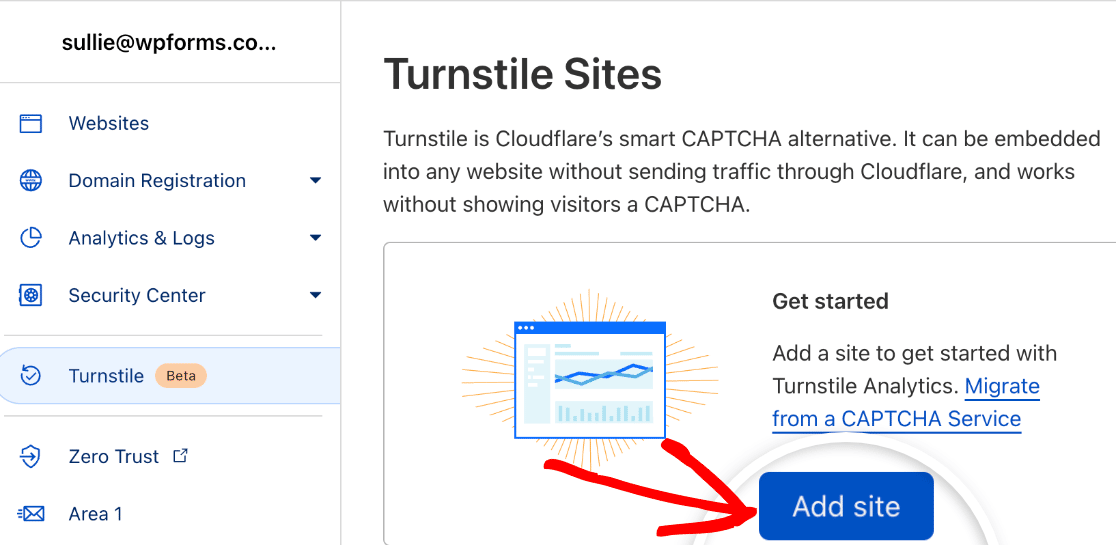
To begin, you’ll need to log in to your Cloudflare account. Once you’ve logged in, select the Turnstile menu and click on Add site.
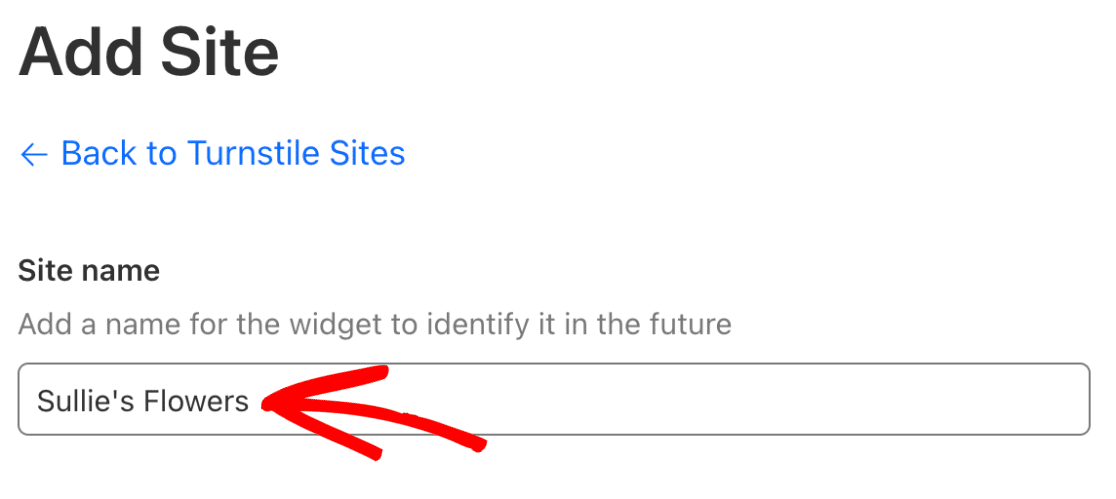
Next, you’ll see an option to enter your Site name. This name is for internal use only to help you identify widgets on your Cloudflare account.
After that, enter your website address in the Domain field.
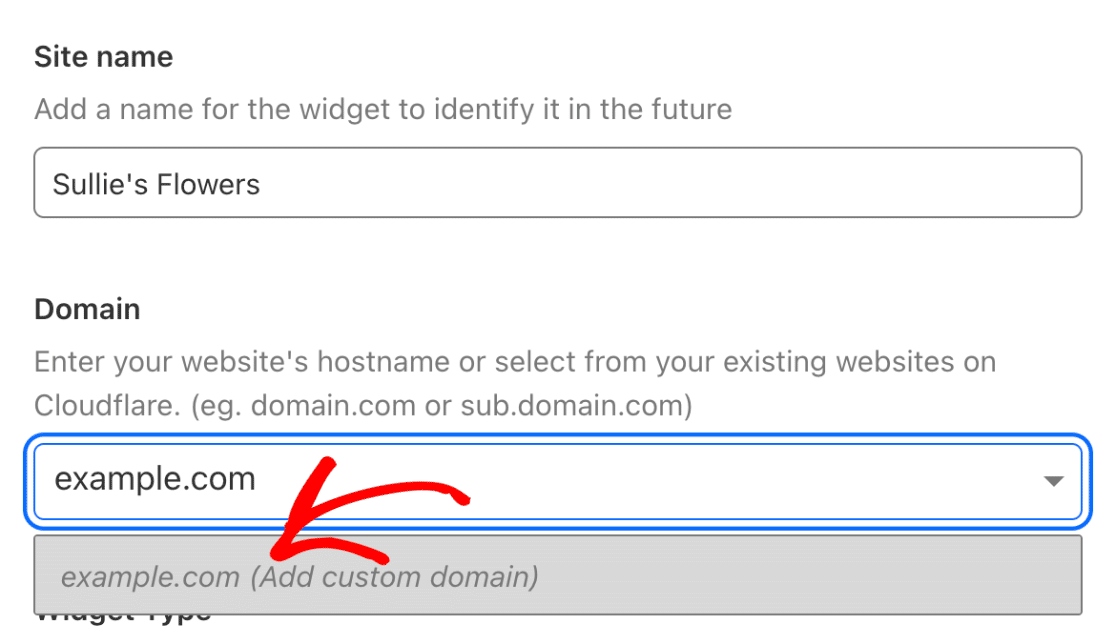
Note: You can add multiple websites in the Domain field. This allows you to use one set of API keys on multiple websites.
Under Widget Type, you’ll need to choose how Cloudflare should process CAPTCHA requests on your forms. Below are the available options:
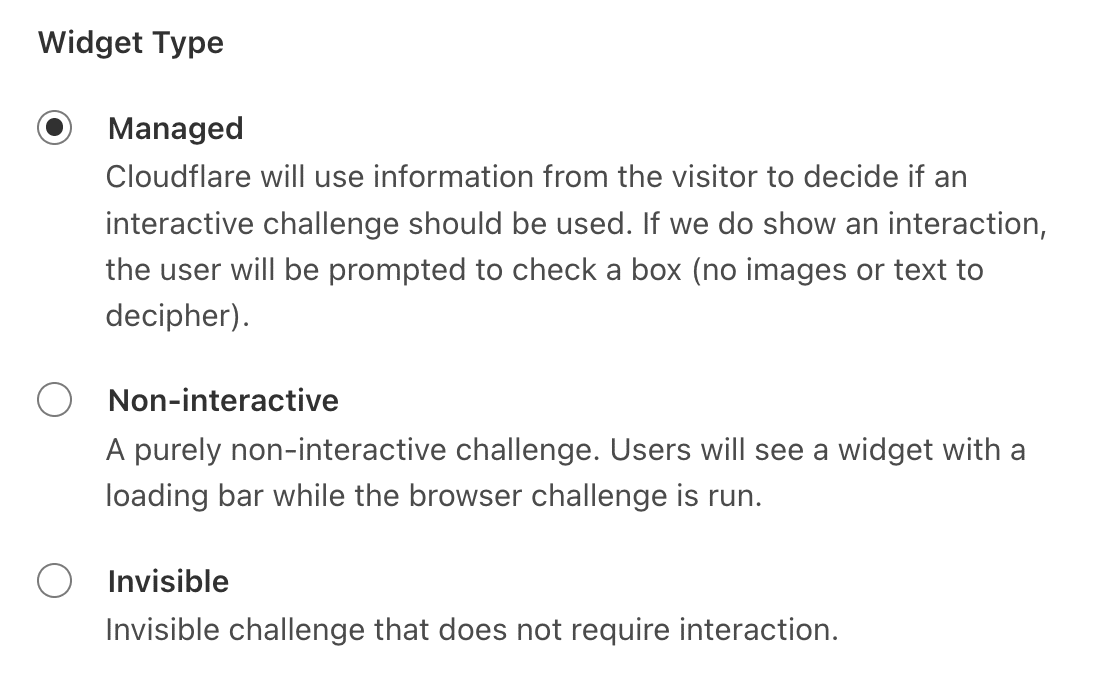
- Managed: This option allows Cloudflare to decide whether to show an interactive challenge or automatically verify the user based on their browser data and interaction.
- Non-interactive: This option will show the CAPTCHA widget on your website’s frontend. However, it doesn’t require user interaction. Cloudflare will automatically run the challenge and verify the user.
- Invisible: This option runs in the background and requires no interaction from the user.
After choosing your widget type, click the Create button to add your site.

This would generate a unique set of API keys for your website.
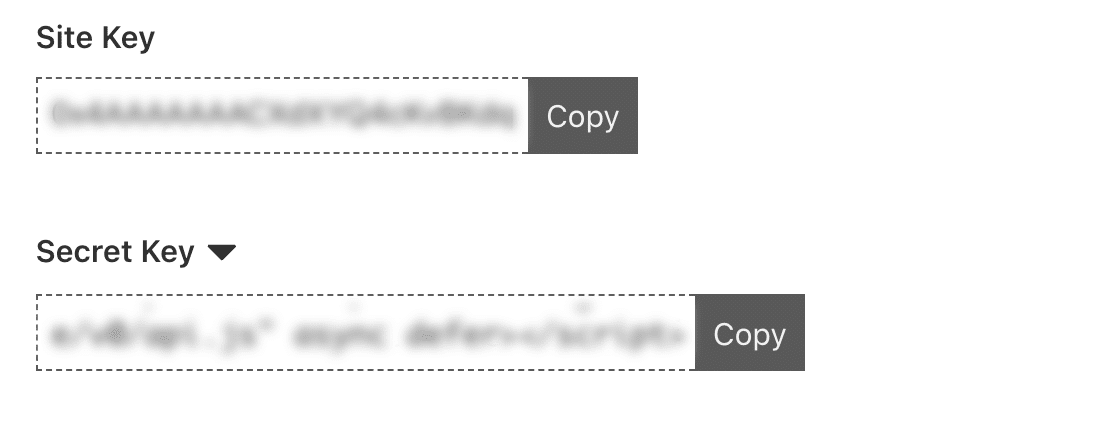
You’ll need to copy the Site Key and Secret Key from Cloudflare. Then head back to your WPForms settings page, and paste each key into its corresponding field.
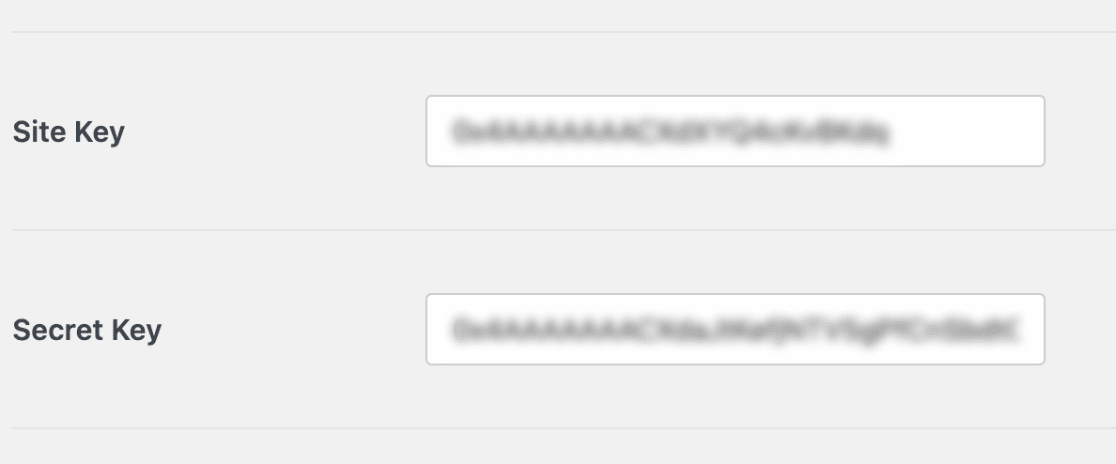
Once you’ve added both keys, proceed to configure additional settings for the Cloudflare Turnstile CAPTCHA.
Configuring Additional Settings
Below the Secret Key, you’ll find the option to update the Fail Message. This is the message displayed when a user attempts to submit a form without completing the Cloudflare Turnstile verification challenge.

Next, choose the style you’d like the widget to use from the Type dropdown. Available options are: Auto, Light, and Dark.

Note: Using the default Auto mode for your widget will toggle between Light and Dark mode depending on the user’s device settings.
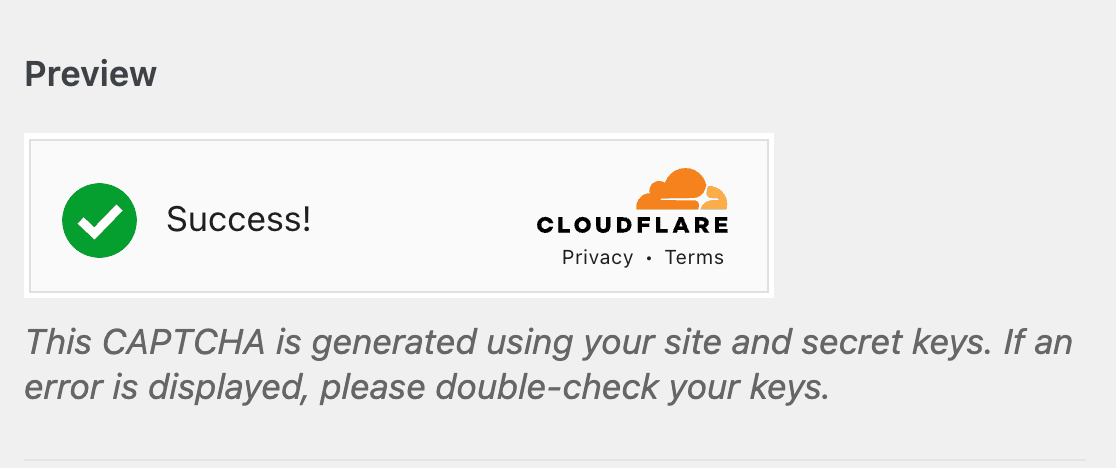
After choosing the CAPTCHA type, you’ll see the Preview section. This shows how the CAPTCHA widget will look on your website’s frontend.
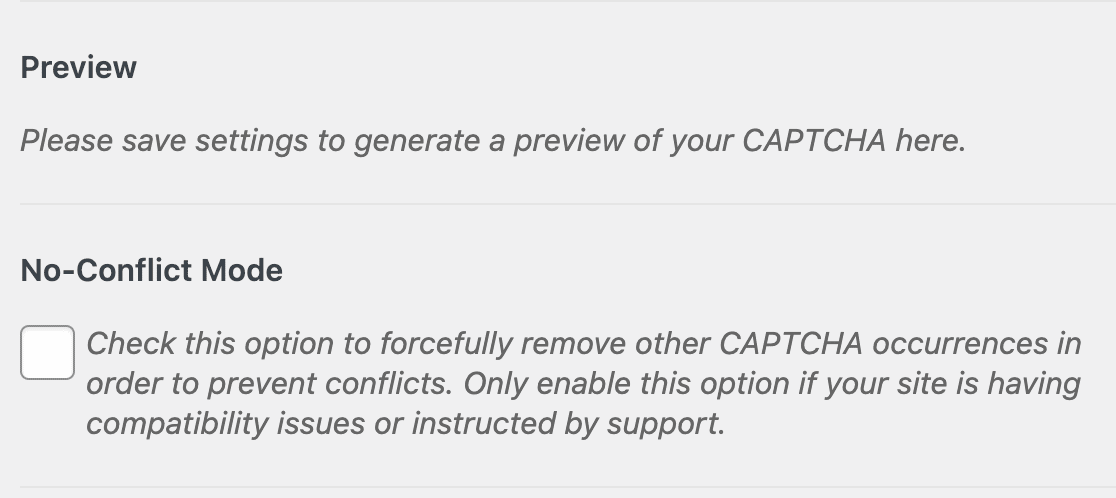
Note: You’ll need to save your settings before you can see a preview of the widget.
Next, you’ll find the No-Conflict Mode settings. If Cloudflare Turnstile is being loaded more than once on your site (for example, by both WPForms and your WordPress theme), this can prevent the Turnstile CAPTCHA from working properly.
No-Conflict Mode will remove any Cloudflare Turnstile code that’s not loaded by WPForms. However, we highly recommend getting in touch with our support team if you’re at all unsure whether to use this option.
When you’re ready, go ahead and click the Save Settings button.

After saving your settings, you should see a preview of the Cloudflare Turnstile widget.
2. Adding Cloudflare Turnstile to a Form
Now that you’ve set up your keys, you’ll be able to enable Cloudflare Turnstile on any of your forms.
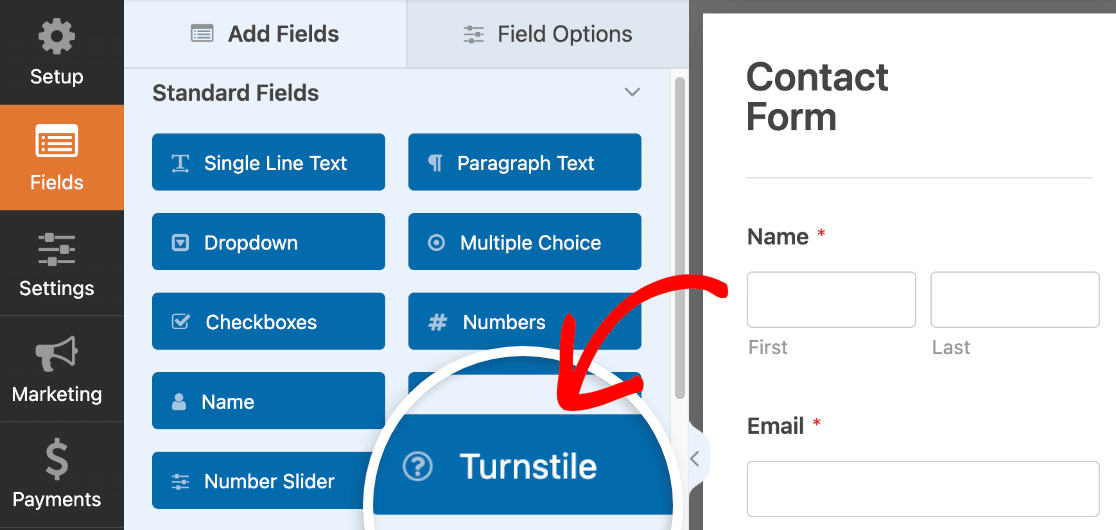
For this, go ahead and create a new form or edit an existing one to access the form builder. Next, look under Standard Fields and select the Turnstile field.
Alternatively, you can always enable or disable Cloudflare Turnstile for a form by going to Settings » Spam Protection and Security in the form builder.
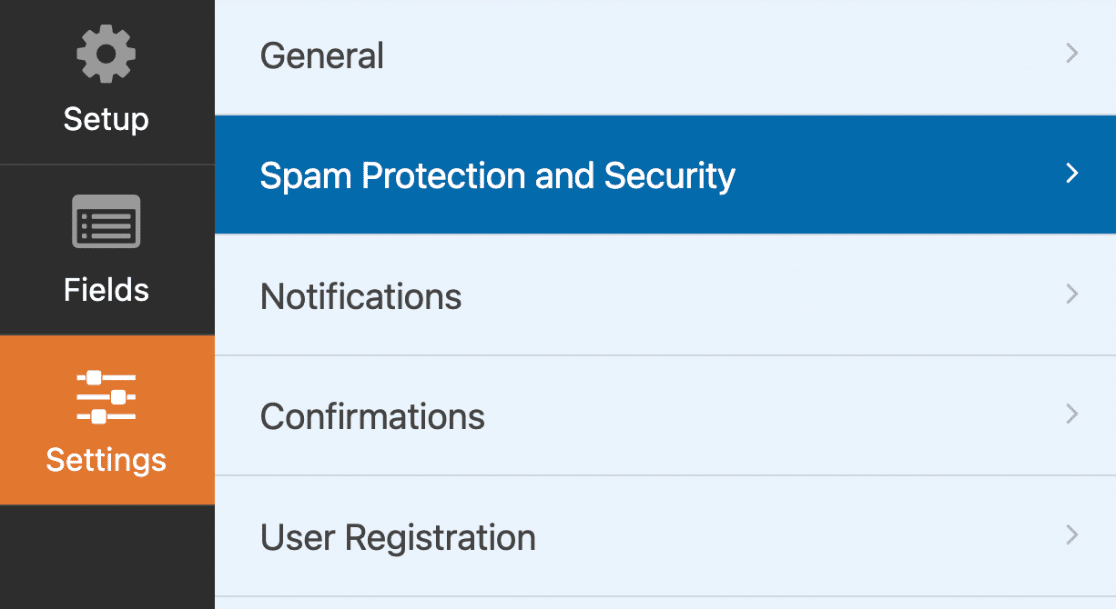
Next, scroll down to the CAPTCHA section and toggle the Enable Cloudflare Turnstile option to the on position.

To confirm that Cloudflare Turnstile is enabled, look for the Turnstile badge in the upper right corner of the form builder.
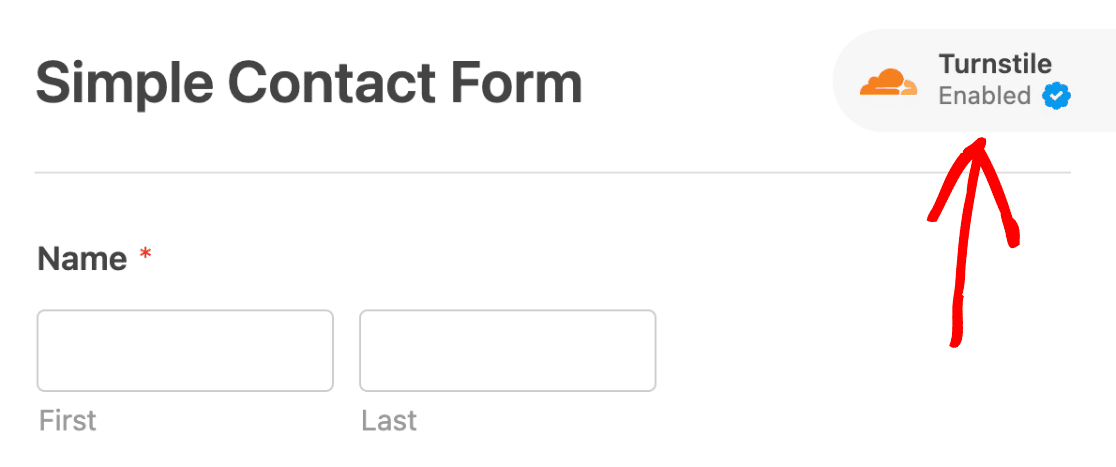
Note: If no badge appears in your form builder, ensure you’ve correctly set up your Cloudflare Turnstile API keys.
3. Testing Cloudflare Turnstile
The last step is to run a quick test to ensure that Cloudflare Turnstile looks and works how you expect.
To test it out, you’ll simply need to submit an entry to your form. For more details on how to test out your forms, please check our full form testing checklist.
Frequently Asked Questions
These are answers to some top questions about setting up Cloudflare Turnstile with WPForms.
Can I see Turnstile CAPTCHA analytics data from my Cloudflare account?
Cloudflare includes an analytics dashboard that shows an overview of Turnstile CAPTCHA challenges for each form you’ve added Turnstile to.
To view Turnstile analytics for your WordPress forms, log in to your Cloudflare account and select the Turnstile sidebar menu. Next, select your site name to open the analytics dashboard.
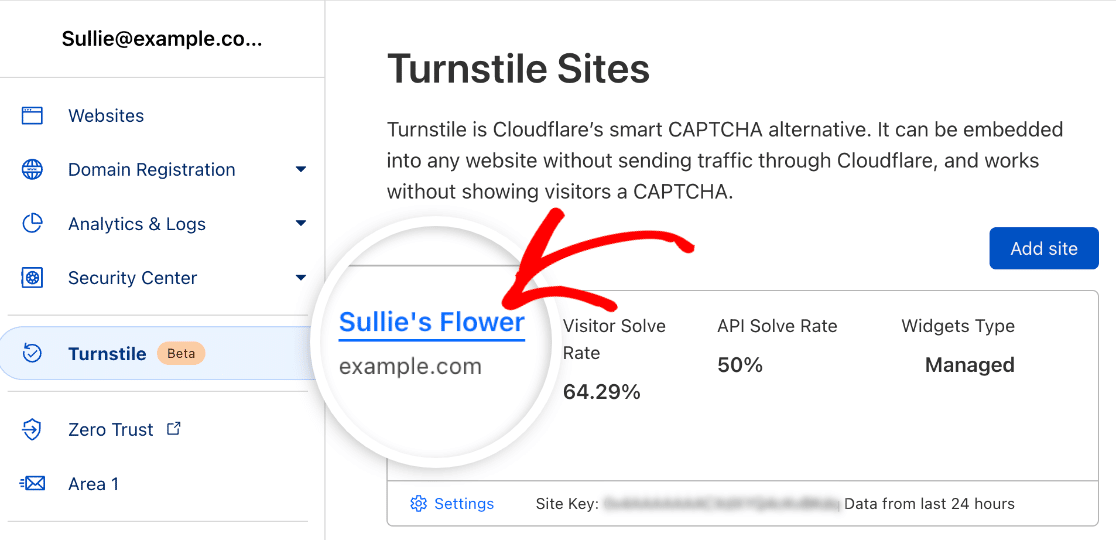
This will show reports containing all the forms you’ve added Cloudflare Turnstile to. You can filter the data to show reports for a specific form.
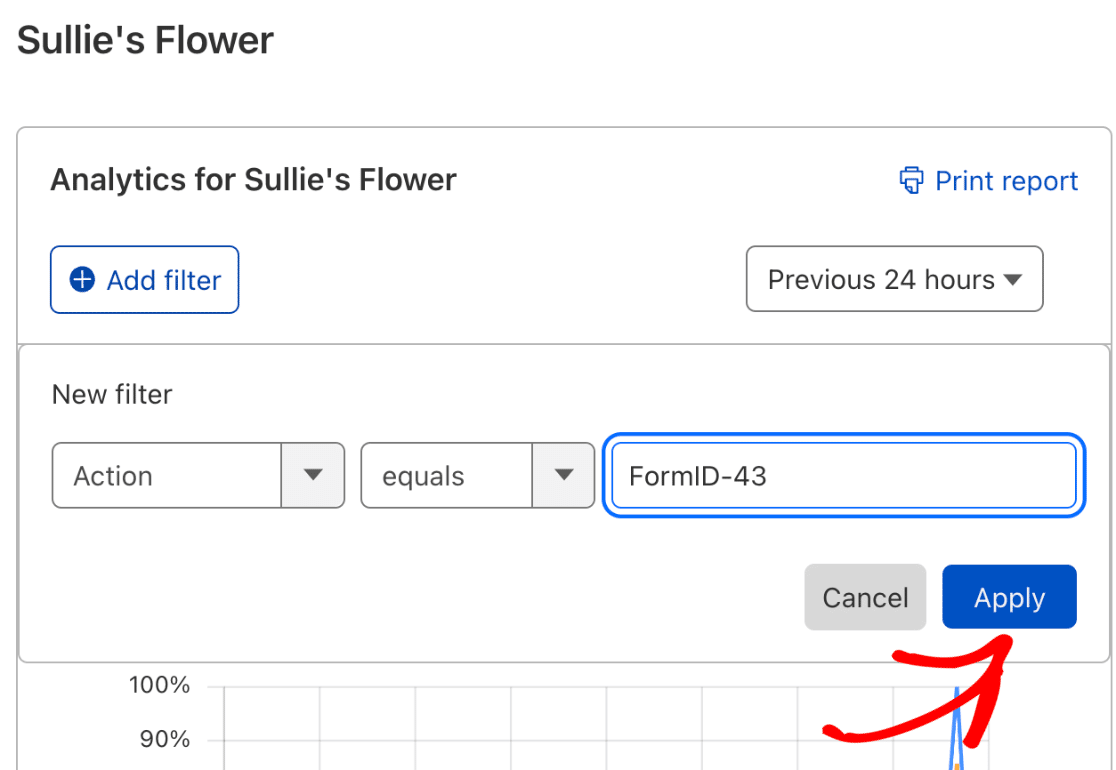
To use the filter option, click on the Add filter button.
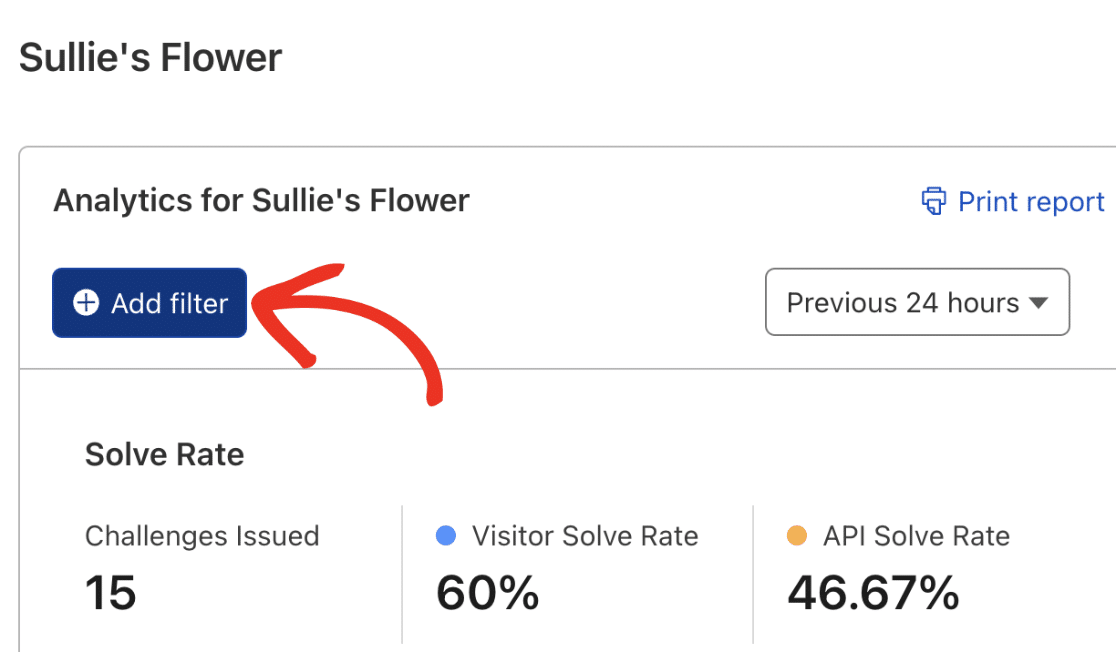
Next, you’ll need to enter the form ID in the New filter conditional using the syntax FormID-XX. Where XX is the ID of the form you wish to see its Cloudflare Turnstile data.
You can always find your form ID from your WordPress dashboard by going to WPForms » All Forms and checking under the Shortcode column.
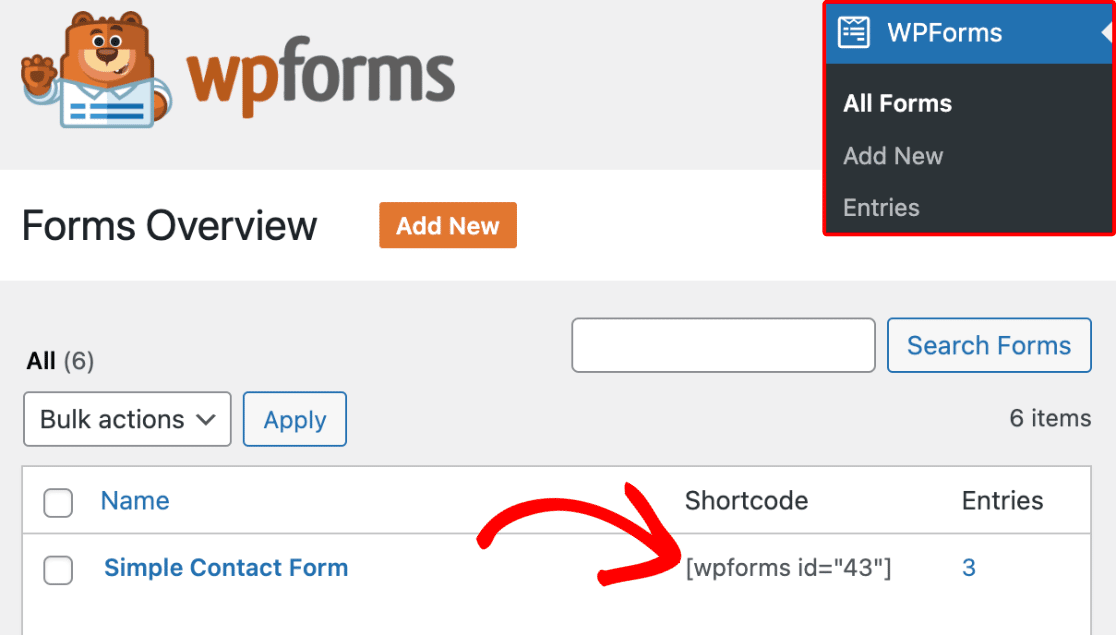
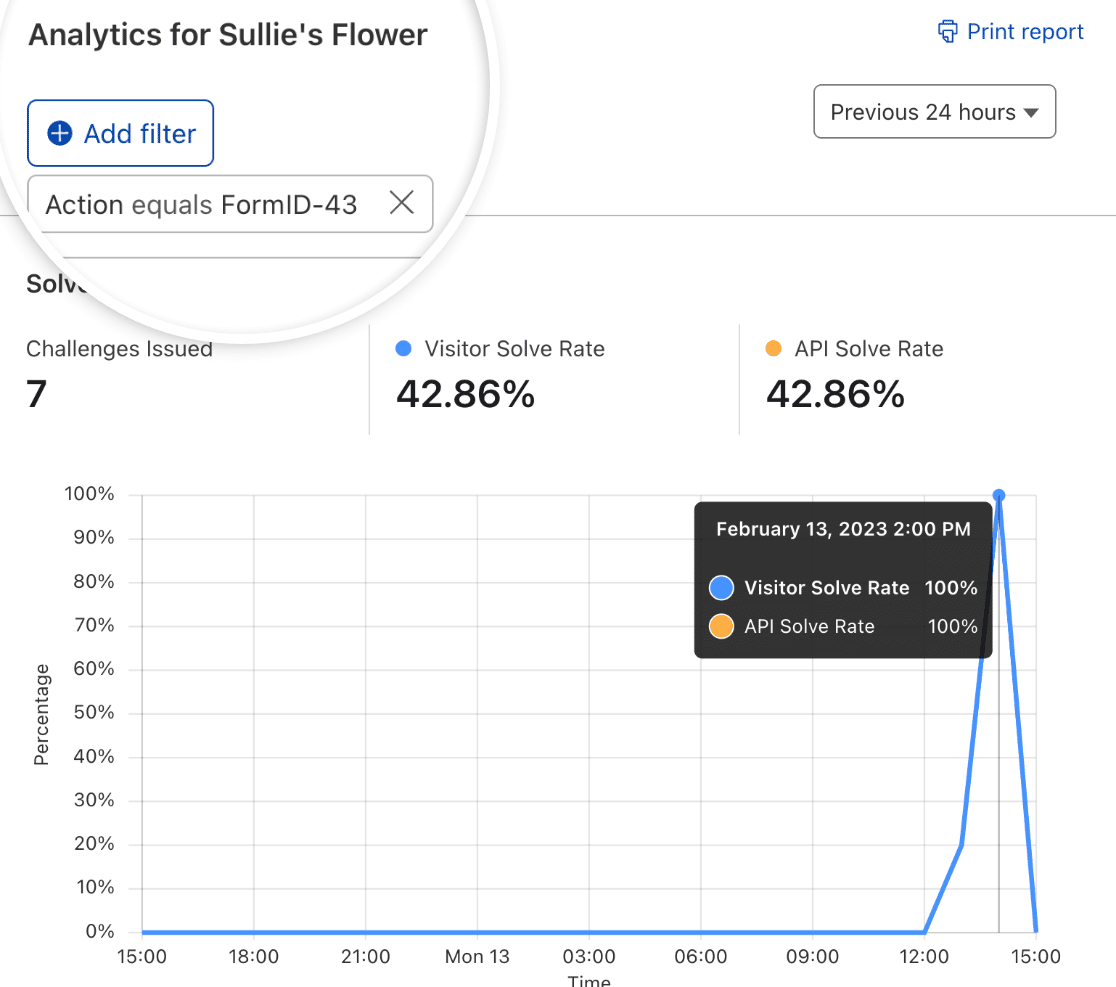
For our example, we’ve set the filter to say: Action equals FormID-43. Click the Apply button to add the filter.
Once you apply the filter, it’ll show analytics data for the specific form you selected.
That’s it! Now you know how to set up and use Cloudflare Turnstile with WPForms.
Read more about Cloudflare Turnstile.

